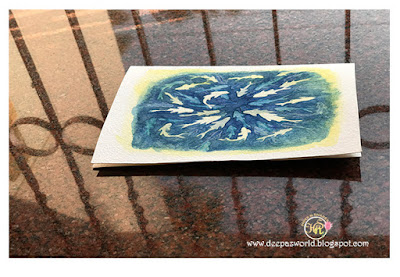
As artists, we draw and paint many complex things using complex techniques but when we get back to some simple and basic stuff, it really makes one feel good...more so it's POSITIVELY FUN! It's again a validation of the fact that joy can be found in simplest of things.
Negative
painting is painting around the subject than painting the subject itself. You
are actually adding by subtracting. You move from lighter to darker as you go
creating an illusion of depth and distance. It a process of layering...lighter
layer to darker layer to the darkest.
Features
It’s actually fun as you don’t need to be an expert at painting to do a negative painting. You just pick up some forms, shapes and paint around it. Once you get the hang of it, it’s pretty easy.
- When you start, you could just sketch some shapes, forms and start painting around it.
- Watercolour seems to be the best medium for it because of its transparency and the glow that it would apparently provide.
- No details needed just blocking out the shapes.
- Let each layer dry before you apply the next layer.
How to do a negative painting?
Things needed:
Handmade paper (You can use any watercolour paper/textured paper etc)
Colours used - Lemon yellow, Gamboge hue, Ultramarine blue and Cobalt blue hue. (I have used Camlin Artists' watercolour cakes)
Brushes
1. Firstly I dampened the paper and glided my brush loaded with lemon yellow and then gamboge hue across the paper for the background. Lifted off some paint with tissue paper as I wanted a pale look. (At this point I was thinking what shape to draw. If I had made up my mind on fish beforehand I wouldn't have painted with these colours though. I was actually thinking of flowers while painting this background!)
Unexpectedly I decided on fish and thought of going along with it as the yellow was pale and so drew some fish forms here.
Unexpectedly I decided on fish and thought of going along with it as the yellow was pale and so drew some fish forms here.
2. I painted the next layer with ultramarine blue but very lightly around the fish.
3. The next layer I used cobalt blue hue after adding a couple more fish.
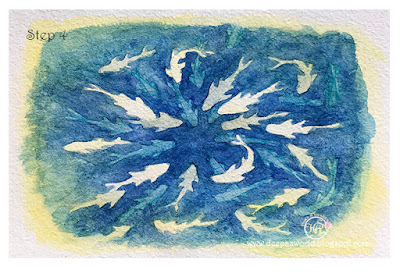
4. Again I added a few more fish and painted the fourth layer using ultramarine blue.
5. The fifth layer I mixed cobalt blue hue and a tinge of black after adding a some more fish.
And that's done!
I have used just 5 layers here (the steps are 6 because I added the fish . You could use less or many more layers depending on the size of your work.
These two are my first and second attempts which was done simultaneously. They have just 3 and 2 layers respectively and are done on regular postcards.
with Gamboge hue, Orange and Scarlet
with Sap green and Emerald green
These 2 designs were inspired from pictures I saw while browsing.
Linda Kemp is a Canadian artist who has some fabulous negative paintings to her credit. She is an instructor in Artists Network and you can find some good videos of hers in YouTube. You can check out her works there. There are two other artists' whose art I really love and both of them have done some negative paintings too and they have taken it to a different altitude! It's Iraville and Pearfluer - checkout these videos...
Hope you enjoyed this post. Do leave me your feedback.
If you wish to check out my earlier postcard series you can click HERE.
Linking it to the Gorgeous PPF community!
Hope you enjoyed this post. Do leave me your feedback.
If you wish to check out my earlier postcard series you can click HERE.
Linking it to the Gorgeous PPF community!


8 comments:
thanks so much for the tips on negative painting along with your beautiful examples. happy PPF!
awesome...so beautiful!!
love shilpa
The technique reminds me of sculpting. The sculptor chips away pieces from a stone block that he does not need and lo and behold, you have a beautiful sculpture in your hands. Negative painting reminds me of that because from what I read in your article you take the canvas or paper and shade out stuff that you don't want with different colors. I am also reminded of an artist who visited my school just for a day when I was a kid. He began drawing on the board and he was just shading things. Initially all of us had a scornful look on our faces. Then slowly it dawned on is that the drawing we were seeing on the black board was a beautiful market scene. It held us enthralled. The way you have created the fish drawing so subtly reminds me of that.
Very cool progress pics and the fish are great! I think the orange leaves is my favorite one, so full of interesting shapes and beautiful color! I like the trees, too. I watched the iraville video and it was terrific.
Wow!!!!! this is amazing, did not know about it, when i saw the first pic and go through the lines"negative painting is.....layer to the darkest" i ws trying to figure out what the first drawing actually contains but was unable and later when read the process and saw the gradual transformation it made surprised, thanks for such a detail and beautiful post.
WOW! This is really amazing. First time heard "negative painting". And loving something negative in life :)
http://www.ranjanascraftblog.com/
Wow that is beautiful.. I wish I had that much talent..
Bikram's
Interesting.
Post a Comment